
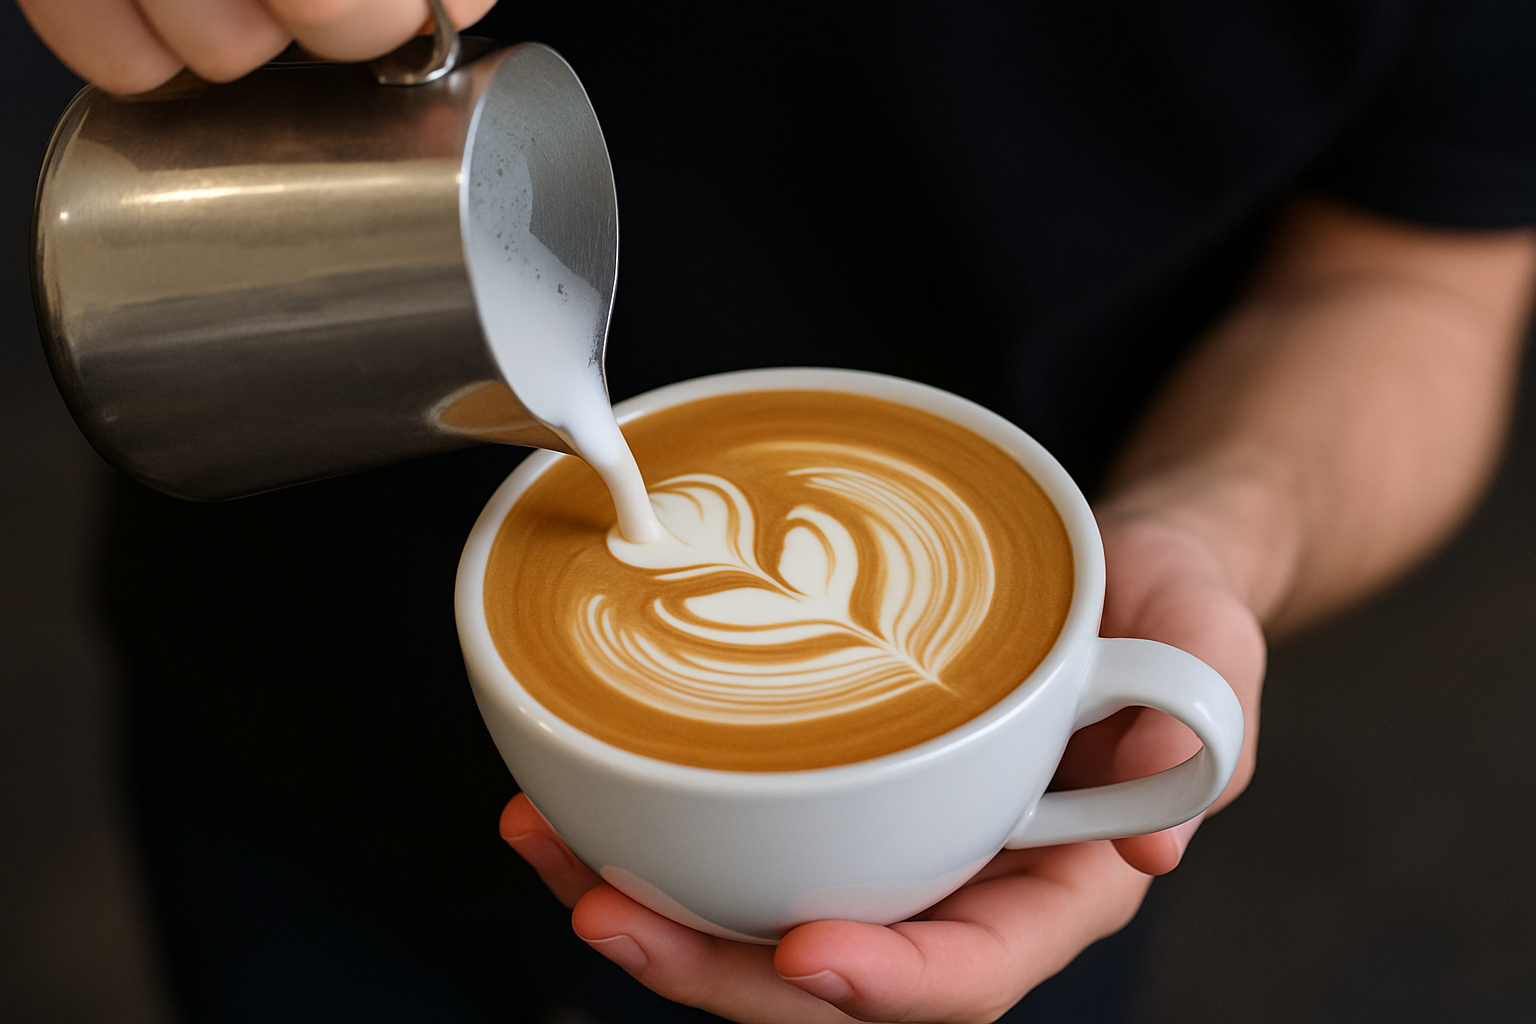
Among all the latte art designs, the tulip stands out as a symbol of balance, precision, and elegance.
Unlike the heart, which is a single motion, or the rosetta, which involves wiggling, the tulip is a layered design made through deliberate, controlled steps.
It challenges the barista to master pour control, flow interruption, and spatial awareness — all while keeping the milk silky and the design symmetrical.
For aspiring baristas, the tulip is a rite of passage. When poured correctly, it’s a stunning, multi-layered floral shape that floats beautifully atop the espresso crema. But mastering it takes more than luck — it requires timing, texture, and technique.
In this guide, you’ll learn exactly how to pour a tulip step-by-step, what tools and textures you need, and how to troubleshoot the most common mistakes. By the end, you’ll be able to consistently pour a tulip that turns heads and earns compliments — from customers, judges, or your Instagram audience.
What Makes the Tulip Special
The tulip is made by stacking successive pushes of milk foam, one on top of the other, and finishing with a clean draw-through. Each “petal” of the tulip is created with a push of milk, and each layer represents both an opportunity and a challenge.
Why it matters:
- Develops control: You learn how to start and stop the pour
- Requires consistency: Each layer must be even and centered
- Visually impressive: Multi-layered and elegant
- Scales easily: From 3-layer beginner tulips to 10+ layer advanced designs
While simple in concept, the tulip tests your ability to control flow rate, pitcher height, and symmetry — all within a few seconds.
What You’ll Need
To pour a proper tulip, you need the right gear, good milk texture, and solid espresso.
Tools
- Espresso machine with reliable steam power
- 12 oz (350 ml) milk pitcher with a rounded or medium-sharp spout
- Whole milk (or high-performance oat milk)
- 5–6 oz ceramic cup for better control
- Thermometer (optional, but helpful when learning)
Your Ingredients
- A freshly pulled espresso with golden crema
- Steamed microfoam milk at 60–65°C (140–149°F)
Tulips demand precision — don’t skimp on quality. Bad milk or espresso will sabotage the design before you even pour.
Step-by-Step: Pouring the Perfect Tulip
Step 1: Pull a Clean Espresso Shot
Start with a well-extracted shot of espresso. It should have:
- A thick, even layer of crema
- No visible holes or blotches
- Pulled within the last 10–15 seconds
A good crema is essential. It provides the canvas for your tulip to sit on.
Step 2: Steam the Milk to Silky Perfection
Your milk should be:
- Velvety smooth with microfoam (no visible bubbles)
- Glossy and shiny like wet paint
- Heated to 60–65°C for best pour performance
Tips:
- Introduce air (stretching) for 1–2 seconds only
- Create a strong whirlpool to integrate foam
- Swirl and tap the pitcher before pouring
Untextured milk = sunken designs. Textured milk = crisp, floating shapes.
Step 3: Tilt the Cup Toward You
Hold the cup at a 20–30° angle. This helps the milk flow to the center and gives you space to layer your petals cleanly.
Cradle the cup firmly and keep it steady. A shaky or unbalanced cup will destroy your symmetry.
Step 4: Start the Base Pour
From about 5–7 cm above the cup, begin pouring a thin stream of milk into the center of the espresso. This:
- Blends the milk and crema
- Creates a uniform base color
- Prepares the canvas for your art
Pour slowly and evenly until the cup is about halfway full.
Step 5: Create the First Petal
Lower the pitcher to 1–2 cm above the surface. Increase the flow slightly, and push a small amount of foam into the center.
This creates a white circle — the base petal.
Immediately stop pouring — either pause completely or quickly pull back the pitcher to break the flow.
Step 6: Add More Petals
Repeat the pour-pause action:
- Move the pitcher slightly back or forward (depends on your technique)
- Push the second dot just behind the first one
- Stop pouring again
- Repeat 2–5 more times depending on your confidence and space
Each petal should be:
- Even in size
- Centered vertically
- Slightly overlapping with the previous one
For a clean tulip, all petals should appear stacked, like a flower from above.
Step 7: Finish with the Draw-Through
Once you’ve added your last petal and the cup is about ¾ full, lift your pitcher slightly and pull a thin stream straight through the center of the stack.
This finishes the tulip and adds the signature tapered bottom.
Tips for a clean finish:
- Don’t rush — a fast draw can ruin everything
- Stay centered — pull your line evenly
- Pour with confidence — hesitation shows in the design
Step 8: Serve with Pride
Wipe the cup edges, serve immediately, and enjoy the reactions. A clean tulip speaks volumes about your control and intention.
Common Tulip Mistakes and How to Fix Them
Mistake 1: Petals Merge into a Blob
Cause: You didn’t stop the flow between layers
Fix: Practice stop-start control and reduce flow rate
Mistake 2: Uneven Petal Sizes
Cause: Inconsistent pour speed or pitcher movement
Fix: Count seconds in your head for each push, and keep hand movement consistent
Mistake 3: Tulip Off-Center
Cause: Pour drift or uneven cup angle
Fix: Realign your hand and cup position before each new layer
Mistake 4: Last Draw Ruins the Design
Cause: Pouring too fast or at the wrong height
Fix: Lift the pitcher slowly and maintain a steady stream
Tips for Mastering the Tulip
1. Start Small
Begin with 3-layer tulips. Focus on symmetry and control before adding more petals.
2. Pour with Rhythm
Think of the pour as a musical beat: push – pause – push – pause – draw. Consistent rhythm leads to consistent results.
3. Use the Right Cup
A rounded tulip cup (5–6 oz) gives you the perfect surface for layering.
4. Watch the Milk Surface
Keep your eyes on the crema and the milk interaction. Don’t stare at your pitcher — it won’t tell you how the design is forming.
5. Record Your Pours
Film your pours and watch them in slow motion. Identify where your flow falters or where symmetry breaks.
6. Practice with Water and Soap
Create mock foam with water and dish soap. Practice the motions without wasting milk and coffee.
Variations of the Tulip Design
Once you master the classic tulip, you can start exploring advanced versions:
Stacked Tulip
- Multiple small petals, precisely layered
- Usually 6–10 layers
Inverted Tulip
- Pouring the tulip upside down, finishing with a heart at the base
Winged Tulip
- Hybrid between a tulip and a rosetta
- Use wiggle motion in some of the layers
Framed Tulip
- Surrounded by a white border or ring, for competition-level impact
Each variation builds on the same foundation: clean pushes, centered placement, and control.
Final Thoughts: Tulips Are a Barista’s Signature
Pouring the perfect tulip isn’t just about showing off — it’s about demonstrating mastery. It shows you understand milk texture, pitcher control, timing, and focus. Every petal you pour tells a story of your skill level.
While it might take dozens — even hundreds — of attempts to nail the tulip consistently, don’t get discouraged. Every pour, even the messy ones, teaches you something.
Soon, what once felt complicated will feel instinctive. And the tulip — elegant, simple, and universally admired — will become your barista signature.

Marcelo Rodrigues is a passionate barista with over 7 years of experience in specialty coffee. He’s worked in top cafés, led barista training sessions, and now shares practical tips to help beginners and coffee lovers improve their skills. Through this blog, Marcel makes the world of coffee more accessible—one cup at a time.