
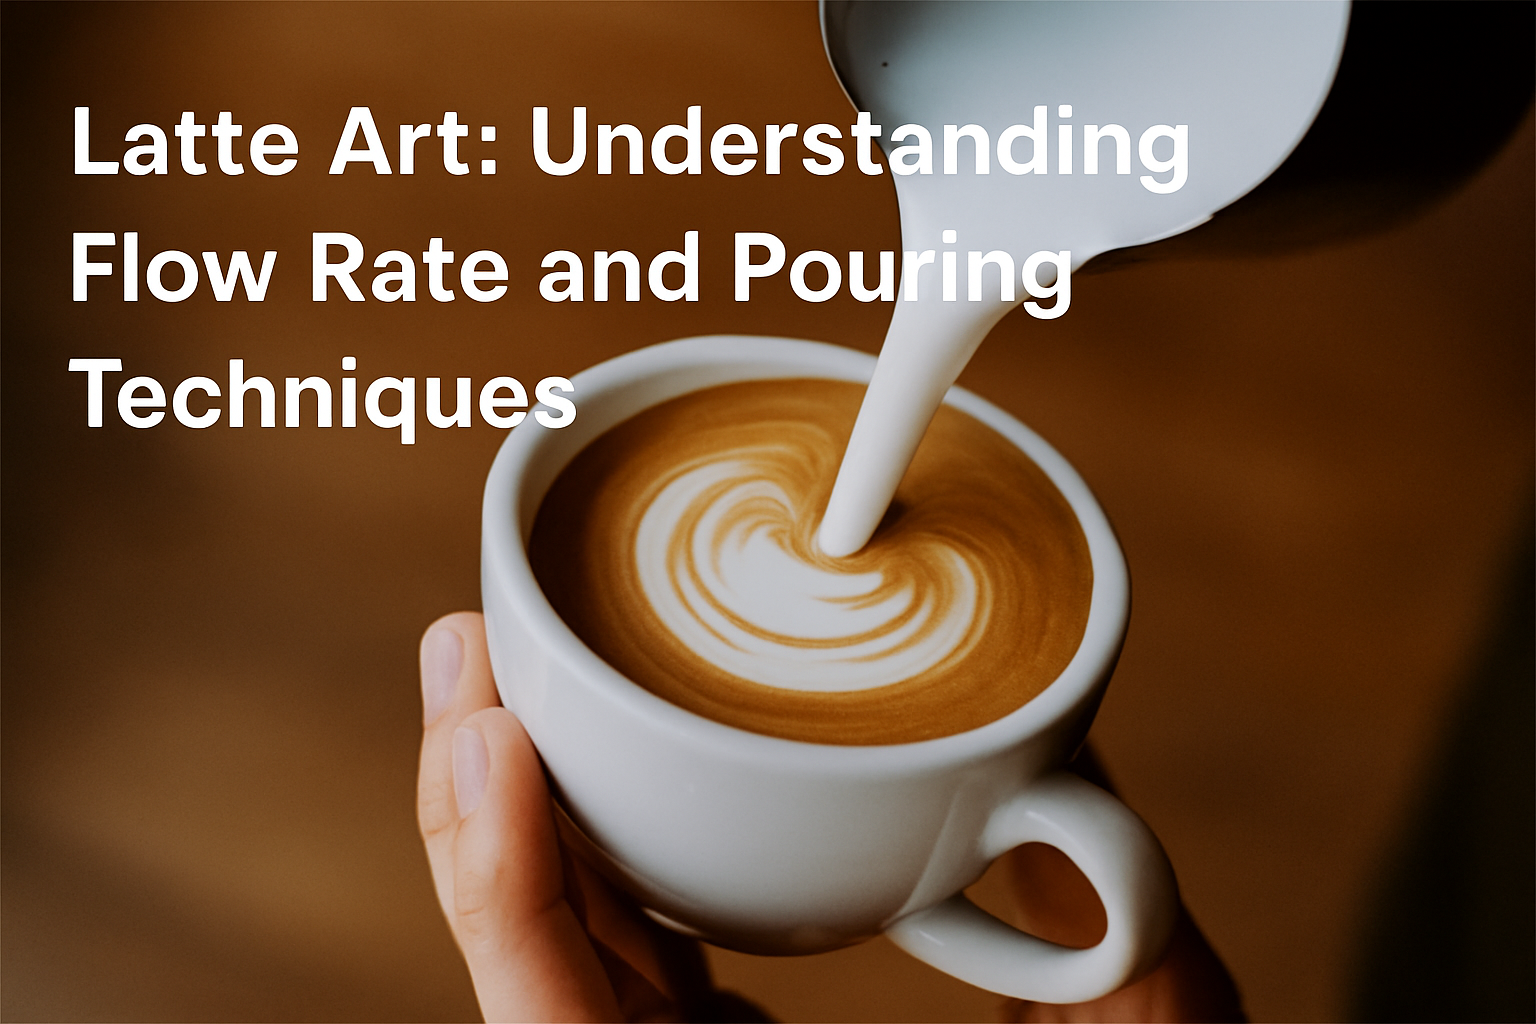
Latte art is more than a visual craft — it’s a physical technique grounded in control, timing, and rhythm.
One of the most important yet misunderstood elements of pouring is flow rate — the speed at which milk leaves the pitcher and enters the cup.
Along with hand positioning and height, your flow rate directly affects the precision, symmetry, and clarity of your latte art designs.
In this article, we’ll break down everything you need to know about flow rate, pouring techniques, and how small adjustments can dramatically change your results.
Whether you’re a beginner learning hearts or an intermediate barista working on rosettas and tulips, this guide will help you fine-tune your movements and gain more control over every pour.
What Is Flow Rate in Latte Art?
Flow rate refers to how fast or slow the milk comes out of the pitcher during a pour. It’s influenced by:
- Pitcher tilt angle
- Spout shape
- Milk texture and viscosity
- Pour height
- Hand speed and stability
Your flow rate determines how much milk hits the crema, how it spreads, and how much contrast and structure your latte art retains. A well-controlled flow is essential for clean shapes and high-definition designs.
Why Flow Rate Matters
Latte art isn’t just “drawn” onto the espresso — it’s poured into existence by managing milk flow into crema. Flow rate affects:
- Design clarity: Too fast = flooding, too slow = weak contrast
- Design size: Faster pours = bigger shapes, slower = more delicate
- Contrast: Fast flow can cut through crema; slower flow rides on top
- Symmetry: Inconsistent flow leads to lopsided designs
- Control: Flow rate helps you “place” the design exactly where you want
Learning to adjust your flow in real time — depending on the shape you’re making — is what separates clean pours from messy ones.
How to Control Flow Rate
Controlling flow rate is about balancing three variables:
1. Pitcher Tilt
The more you tilt the pitcher forward, the faster the milk pours. A shallow tilt equals slower flow.
Pro tip: Keep your wrist stable and use subtle angle changes for flow control.
2. Pour Height
Pouring from high (10–15 cm above the cup) creates a thin stream that cuts through crema. Perfect for integrating milk at the start.
Pouring low (1–2 cm above the surface) creates a thicker stream that sits on top of the crema and allows you to draw designs.
Use height to control how milk interacts with espresso.
3. Pour Speed
This is how fast you move your hand during the pour. Pouring faster increases flow — even with the same pitcher tilt.
Combine all three variables for precise control over milk delivery.
Stages of Pouring and Flow Rate Adjustments
Each latte art pour has three main stages, and your flow rate should adjust in each one:
Stage 1: The Base Pour
- Goal: Mix milk and espresso without breaking crema
- Height: High (10–15 cm)
- Flow rate: Slow and steady
- Effect: Creates a uniform base for your design
This stage is all about integration — avoid pouring too quickly, or you’ll lose crema before the design.
Stage 2: The Art Pour
- Goal: Create the shape (heart, tulip, rosetta)
- Height: Low (1–2 cm)
- Flow rate: Medium to fast
- Effect: The milk floats on the surface and forms visible contrast
Here, a faster pour spreads the white foam and builds shape. A slower pour gives you more control but smaller shapes.
Stage 3: The Finish (Drag or Draw-Through)
- Goal: Define and complete the design
- Height: Mid to high
- Flow rate: Slow and controlled
- Effect: A thin stream draws a line or finishes the design
The drag is usually done with the pitcher tilted only slightly — enough to draw without flooding.
Pouring Techniques for Popular Designs
Let’s apply flow rate control to specific latte art patterns.
Hearts
- Base: Slow, high pour
- Design: Lower the pitcher and increase flow to create the round shape
- Finish: Lift and slow pour to drag through
Tulips
- Base: Same as heart
- Design: Drop multiple dots or “blobs” by pulsing the flow
- Finish: Drag through with light stream and slow speed
Tulips require excellent flow stopping and restarting control — each shape is made by pouring, stopping, then pouring again.
Rosettas
- Base: High and slow to integrate
- Design: Low and consistent flow with wiggle motion
- Finish: Lift and draw through to form stem
Rosettas need a stable, medium-fast flow to keep the leaves connected and balanced.
Common Flow Rate Mistakes and Fixes
1. Pours Are Too Fast
Symptoms: Washed-out designs, no contrast, overflow
Fixes:
- Reduce tilt of the pitcher
- Lower the height when doing design work
- Slow your hand movement
2. Pours Are Too Slow
Symptoms: Incomplete shapes, milk sinks under crema
Fixes:
- Increase tilt slightly
- Move closer to the surface during the design phase
- Practice steady wrist movement
3. Inconsistent Flow
Symptoms: Broken shapes, asymmetrical patterns
Fixes:
- Practice consistent hand movement
- Use the same pitcher and milk volume while learning
- Film yourself and watch hand stability
How to Practice Flow Control
- Use water and dish soap in a pitcher to mimic milk texture without wasting product
- Draw a circle on a piece of paper and try pouring directly into the center
- Practice stopping and restarting flow cleanly to simulate tulip stacking
- Focus on slow, consistent pours before trying speed
With regular practice, you’ll feel more confident adjusting flow rate mid-pour.
Tools That Help With Flow Control
- Pitchers with sharp spouts allow better precision and thinner streams
- Tapered bodies help control speed naturally
- Handleless pitchers offer more wrist flexibility (advanced)
- Practice cups (narrower shapes) teach you to focus flow more tightly
Your equipment should match your skill level — don’t make things harder than they need to be.
Final Thoughts: Flow Rate Is Your Paintbrush
Flow rate is what connects your technique to your design. It’s your paintbrush stroke in every cup. By understanding and controlling how milk flows from the pitcher, you’ll unlock cleaner, more symmetrical, and more expressive latte art.
Start slow, build consistency, and experiment with small adjustments. You’ll be amazed how much difference a tiny change in angle or height can make.
Every great design starts with control — and control begins with understanding flow.

Marcelo Rodrigues is a passionate barista with over 7 years of experience in specialty coffee. He’s worked in top cafés, led barista training sessions, and now shares practical tips to help beginners and coffee lovers improve their skills. Through this blog, Marcel makes the world of coffee more accessible—one cup at a time.